Fundamentals of Digital Image Correlation (DIC)
Every material test relies on sensors to gather accurate data about the phenomenon under study. The most common quantities of interest in material testing are stresses and strains. In order to measure these, sensors record the force and deformation during the test. While force sensing is often as simple as using a load cell, deformation sensing can be much less straightforward. Traditionally, deformation was measured using strain gauges and extensometers. However, these tools come with significant drawbacks and limitations. Recent advances in optical measurement techniques provide another way to monitor strain: Digital Image Correlation (DIC). This article will cover the basics of DIC, including DIC principles, equipment, algorithms and output.
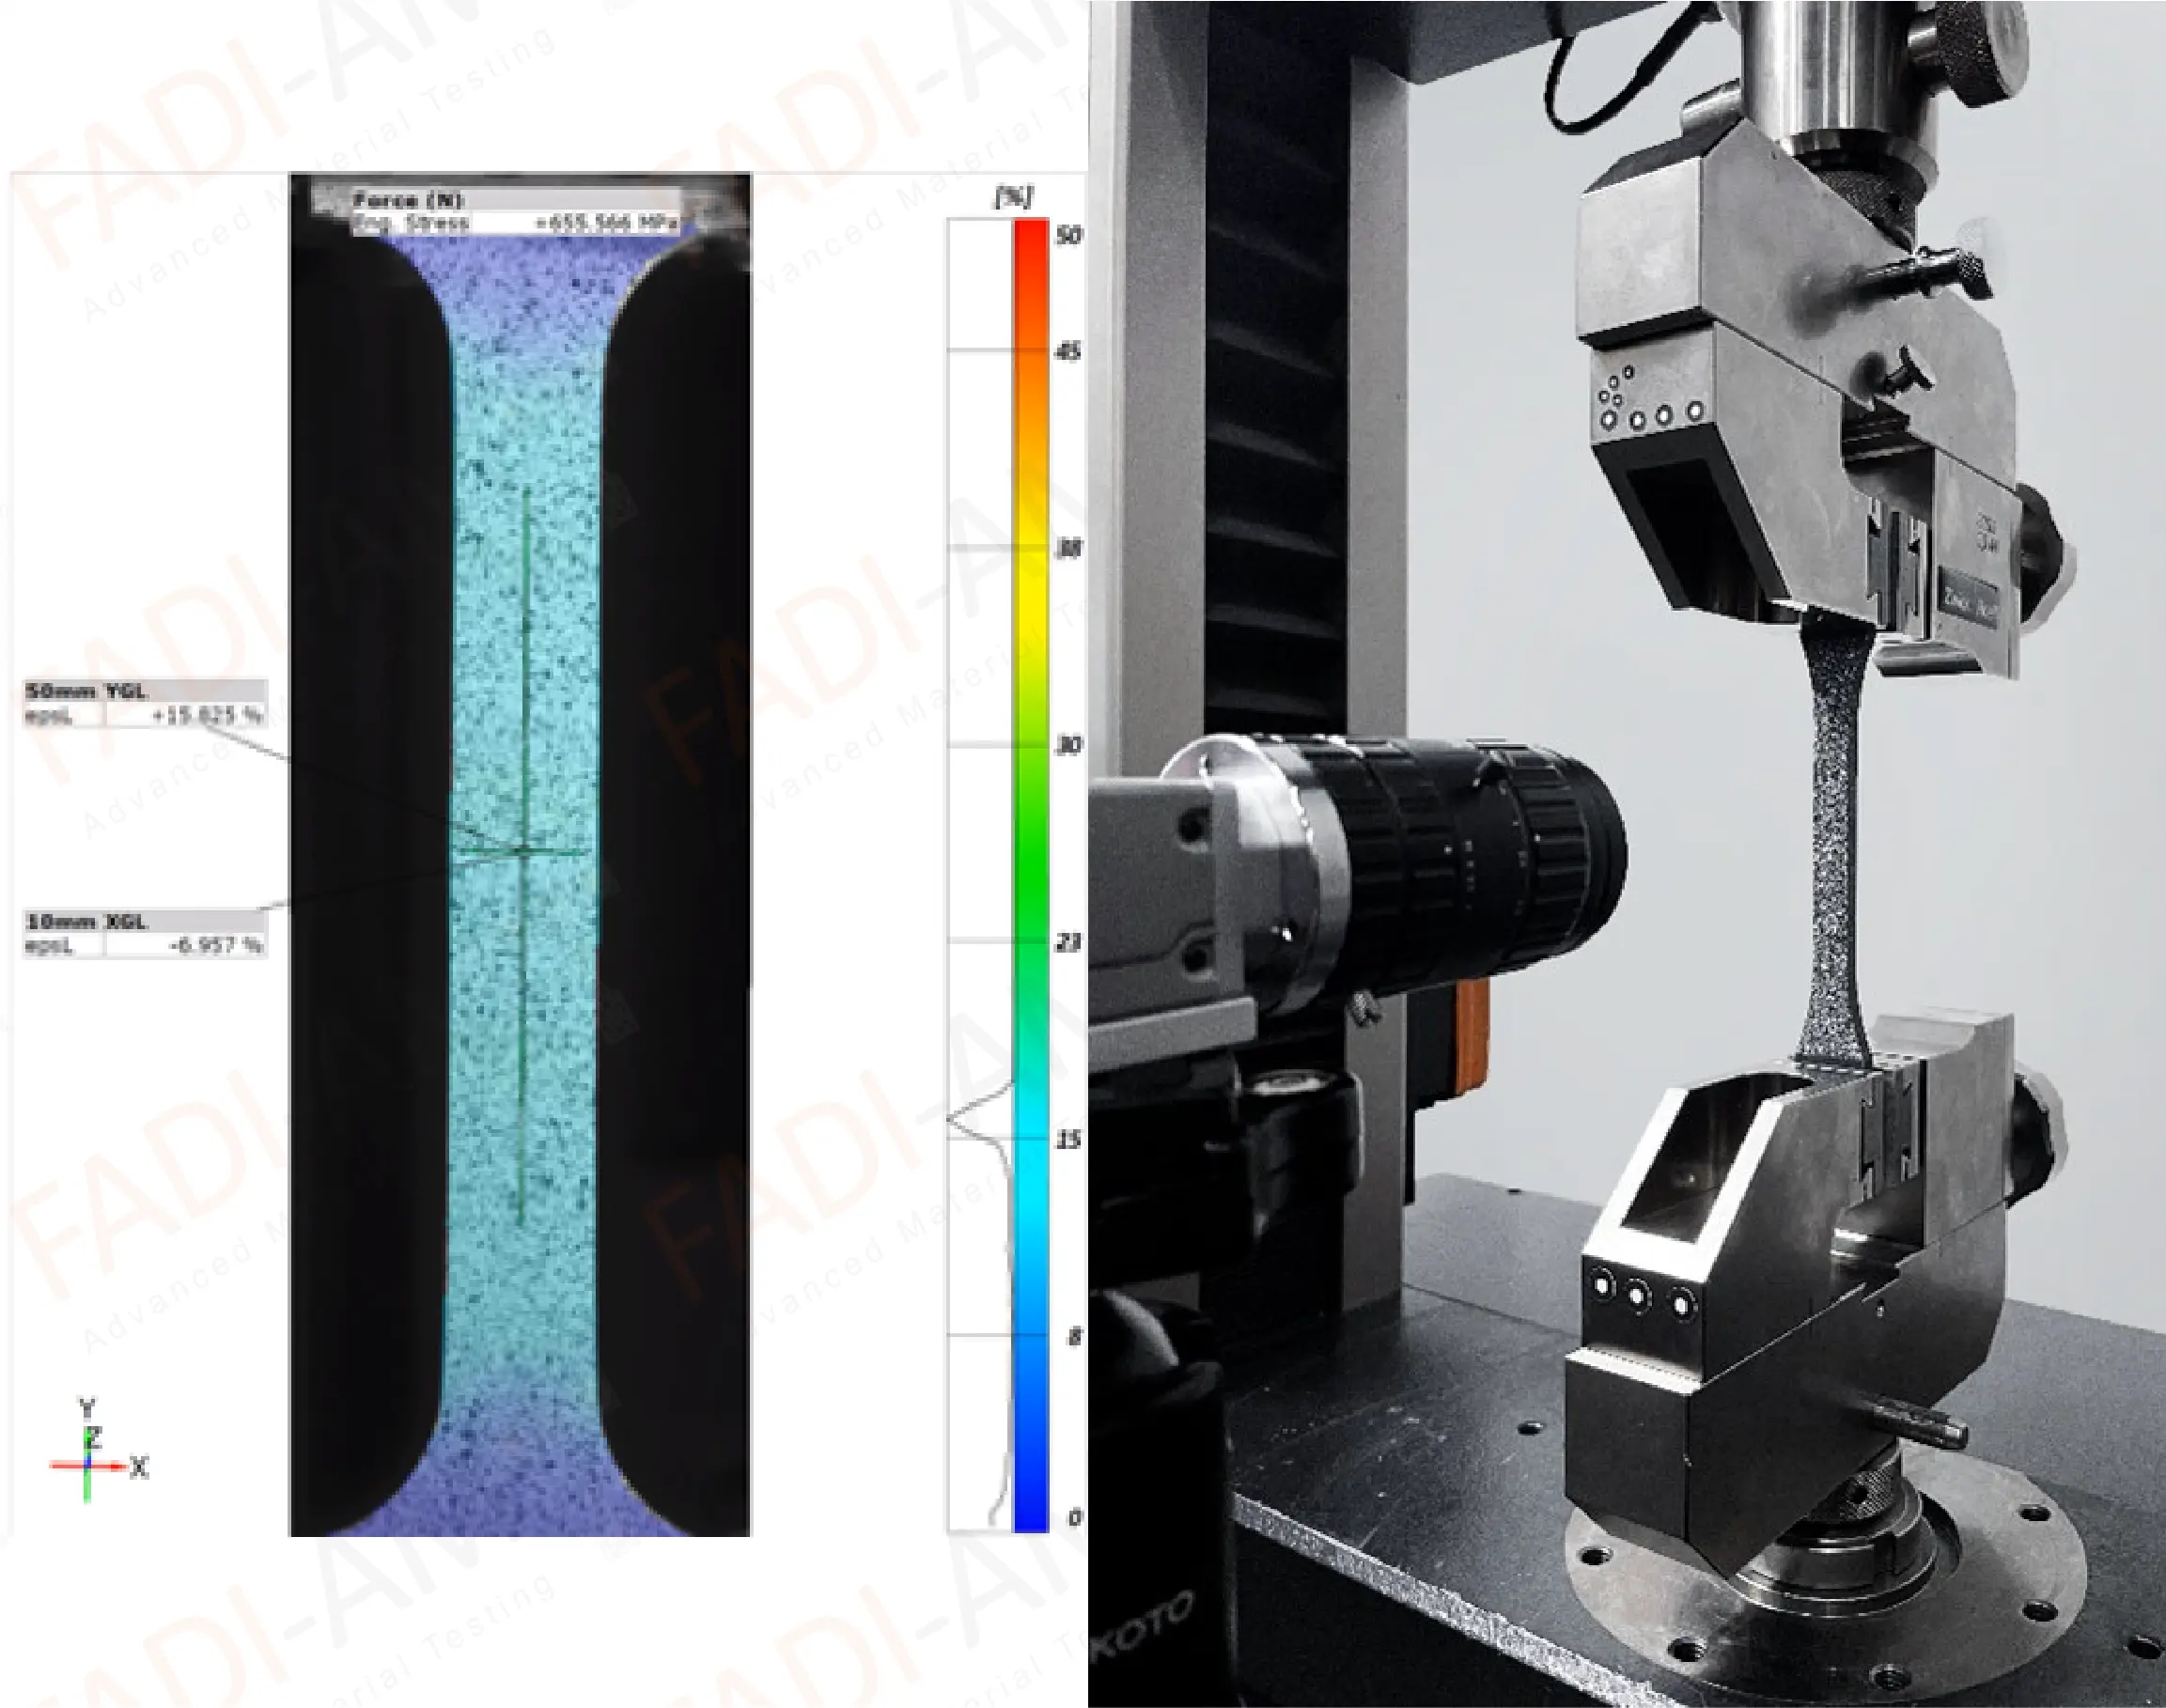
 Fundamentals of Digital Image Correlation
Principles of Digital Image Correlation (DIC)
Digital Image Correlation is an optical measurement technique. It uses cameras to sense and record movement happening in the real 3D world. Fundamentally, a camera is a device that collects information from light. The exact pattern of light reaching a camera sensor is what produces images, which are essentially packets of stored information. Each image tells us what the world looked like within the camera field of view at the time that the image was taken. The key to DIC (as well as other optical measurement techniques) is to realize that the apparent position of objects in a camera image can be used to measure the actual position of those objects in the real world.
This is highly intuitive for large-scale, low-precision measurements. For example, if you see a photograph where two people appear to be standing and facing each other, you will probably assume that they were, in fact, standing and facing each other when the photo was taken. But why stop with such vague information? Depending on the characteristics of the camera, you might also be able to estimate the distance between the tips of their noses to a precision of 0.01 mm.
Similarly, camera images can be used to accurately estimate the position of tiny features on the surface of a material. Multiple images can be used to estimate the change in position of those tiny features over time. In other words, images can be used to measure material deformation, making it possible to use them as strain sensors.
DIC is the method used to accomplish this. It uses a computer algorithm which can be broken down into three steps: (1) identify key points, (2) track the position of key points in a series of many sequential images, and (3) interpret the motion of the key points within the images to measure real motion in the physical world.
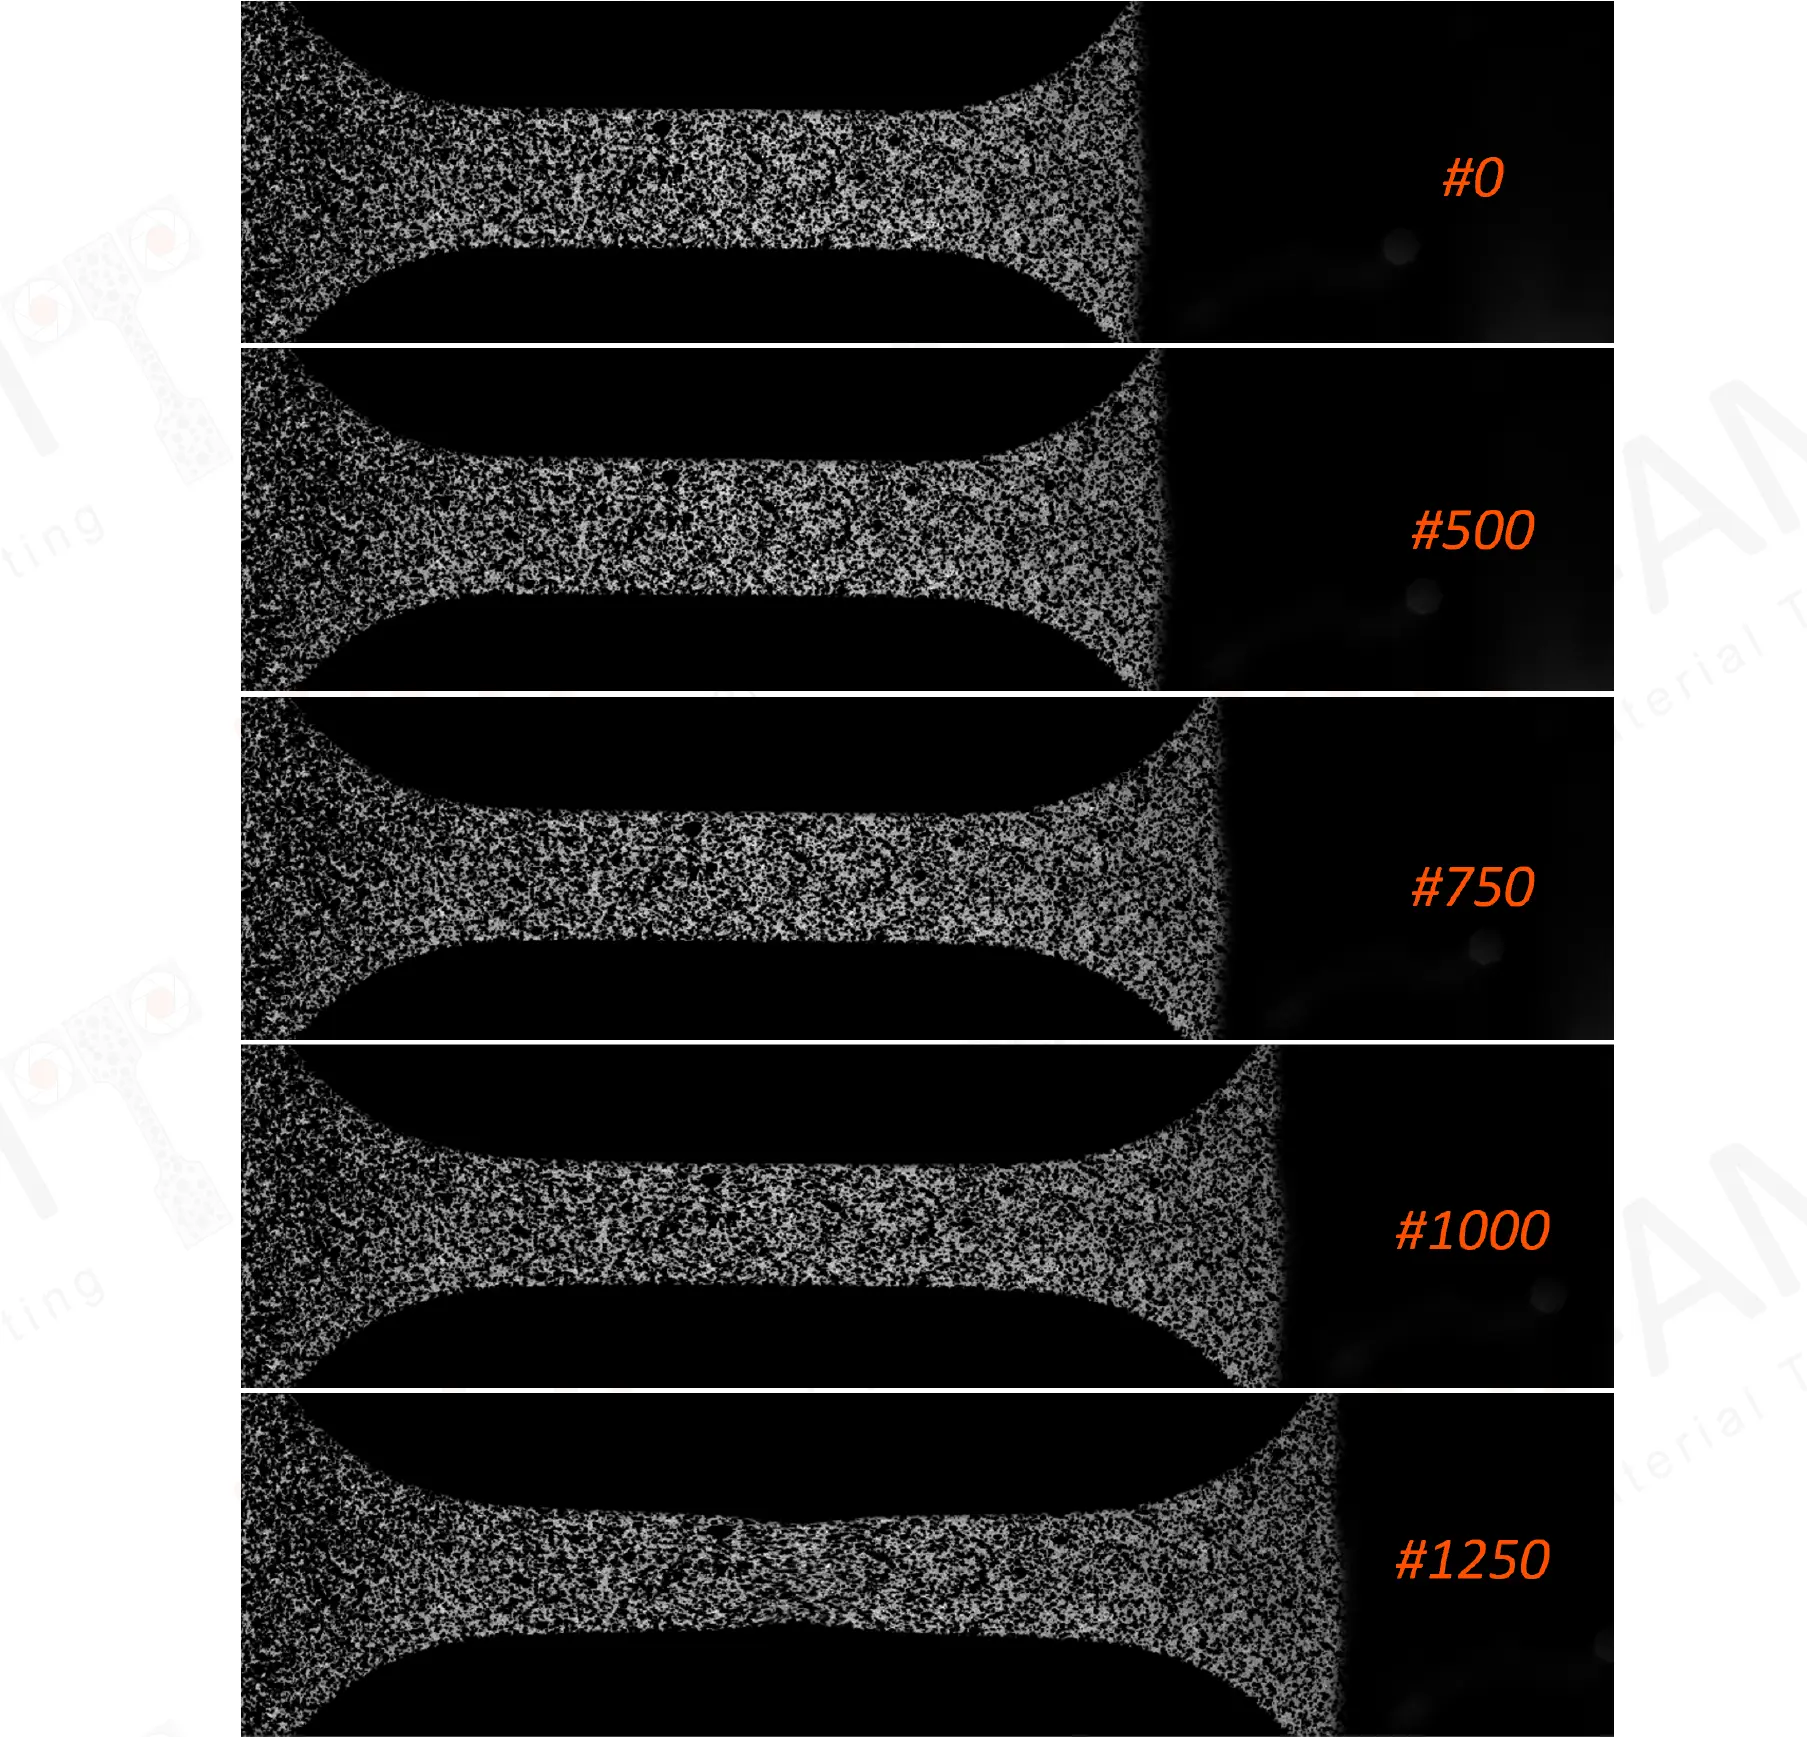
 Principles of DIC
Digital Image Correlation (DIC) Equipment and Setup
Since DIC is a type of strain sensing, it requires a testing apparatus to gather information about. Like a traditional extensometer, DIC systems can be seen as an accessory for a material test; all the other testing equipment is still required, including testing machines, force sensors, and computer processing equipment. The exact configuration varies depending on the type of test. DIC introduces the additional limitation that the surface of the material sample must be visible, but for most types of testing this is easily achieved.
To understand DIC, it is helpful to think in terms of input-process-output. DIC algorithms require certain information as input. The algorithms process the input information in a certain way, which creates the desired information (strain, etc.) as output. The main input required by DIC is a series of timed-images.
These images must be taken sequentially, and they must be taken from the same location relative to the test sample. Therefore, DIC requires at least one static camera which can record images of the surface of interest in a defined measurement sequence (known time intervals). Though DIC can technically be performed with only a single camera, additional pieces of equipment are often used to make obtaining results easier and more accurate.
Camera accessories are one example of this. Most DIC applications require the use of camera mounting equipment and additional lighting. Various types of lenses may be used to achieve the best field of view and distortion properties; these particulars are beyond the scope of this article.
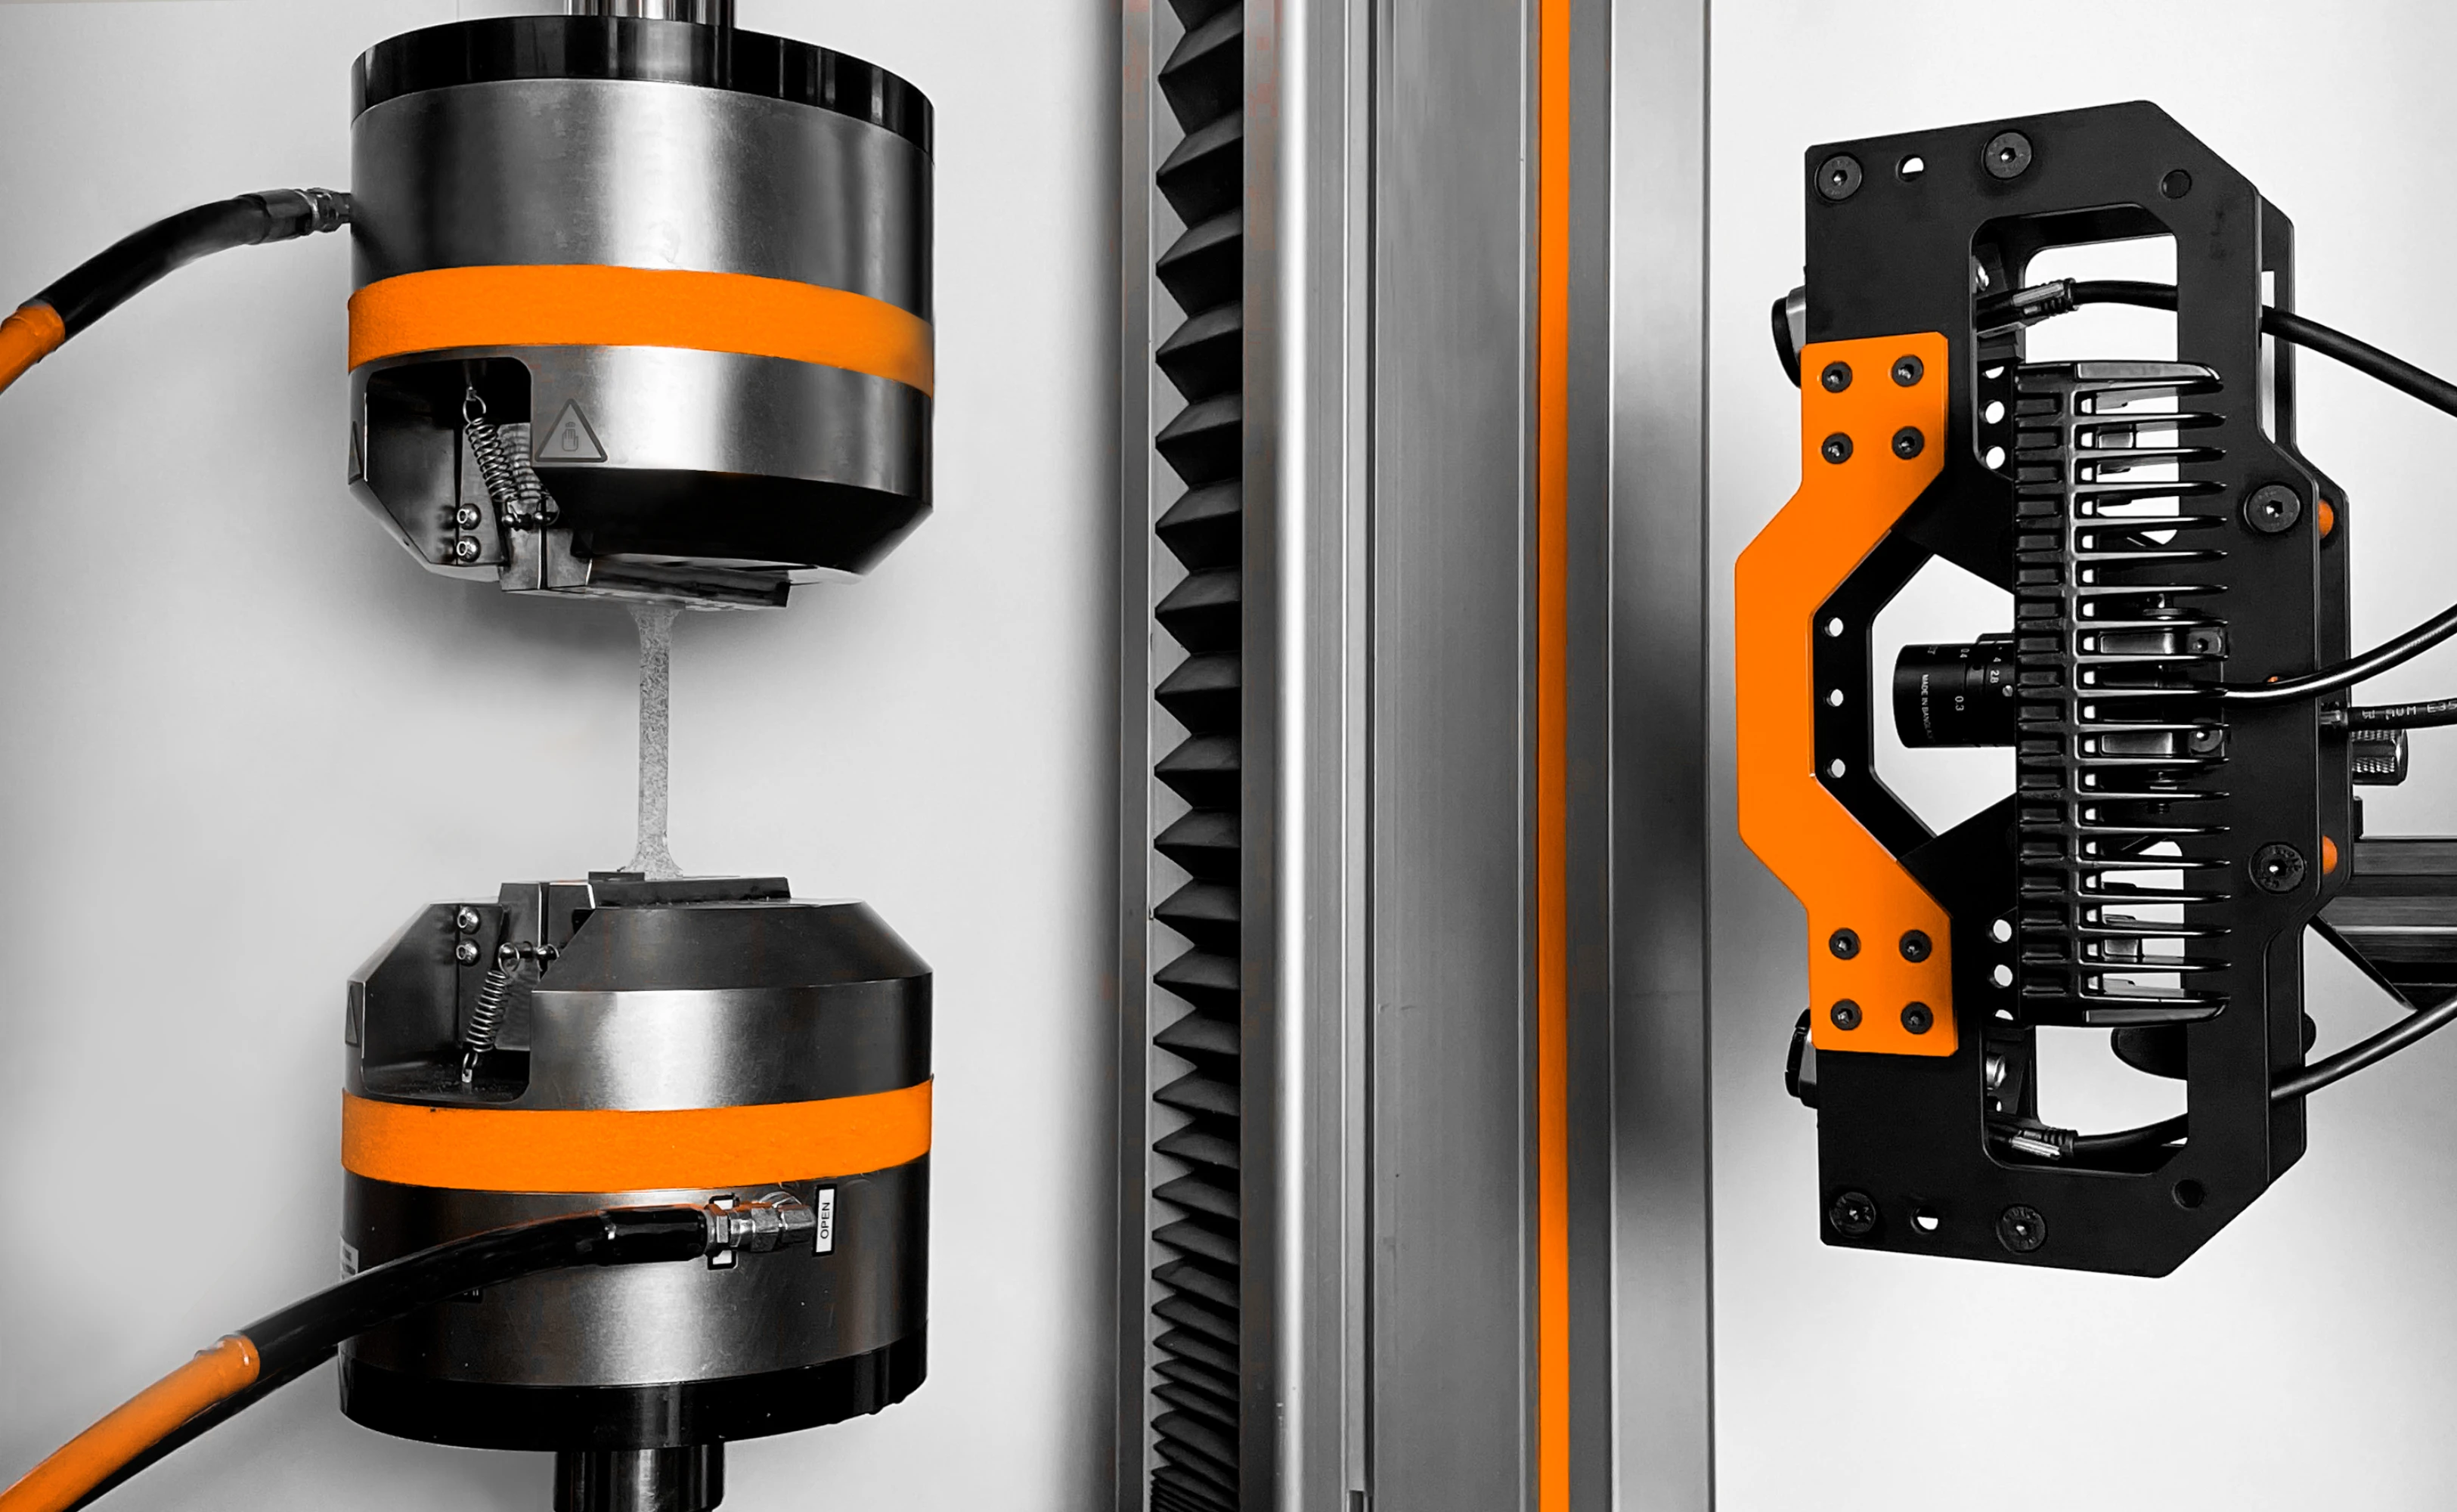
 2D-DIC-with-Tension Testing Setup_Z050_mi-Sensor
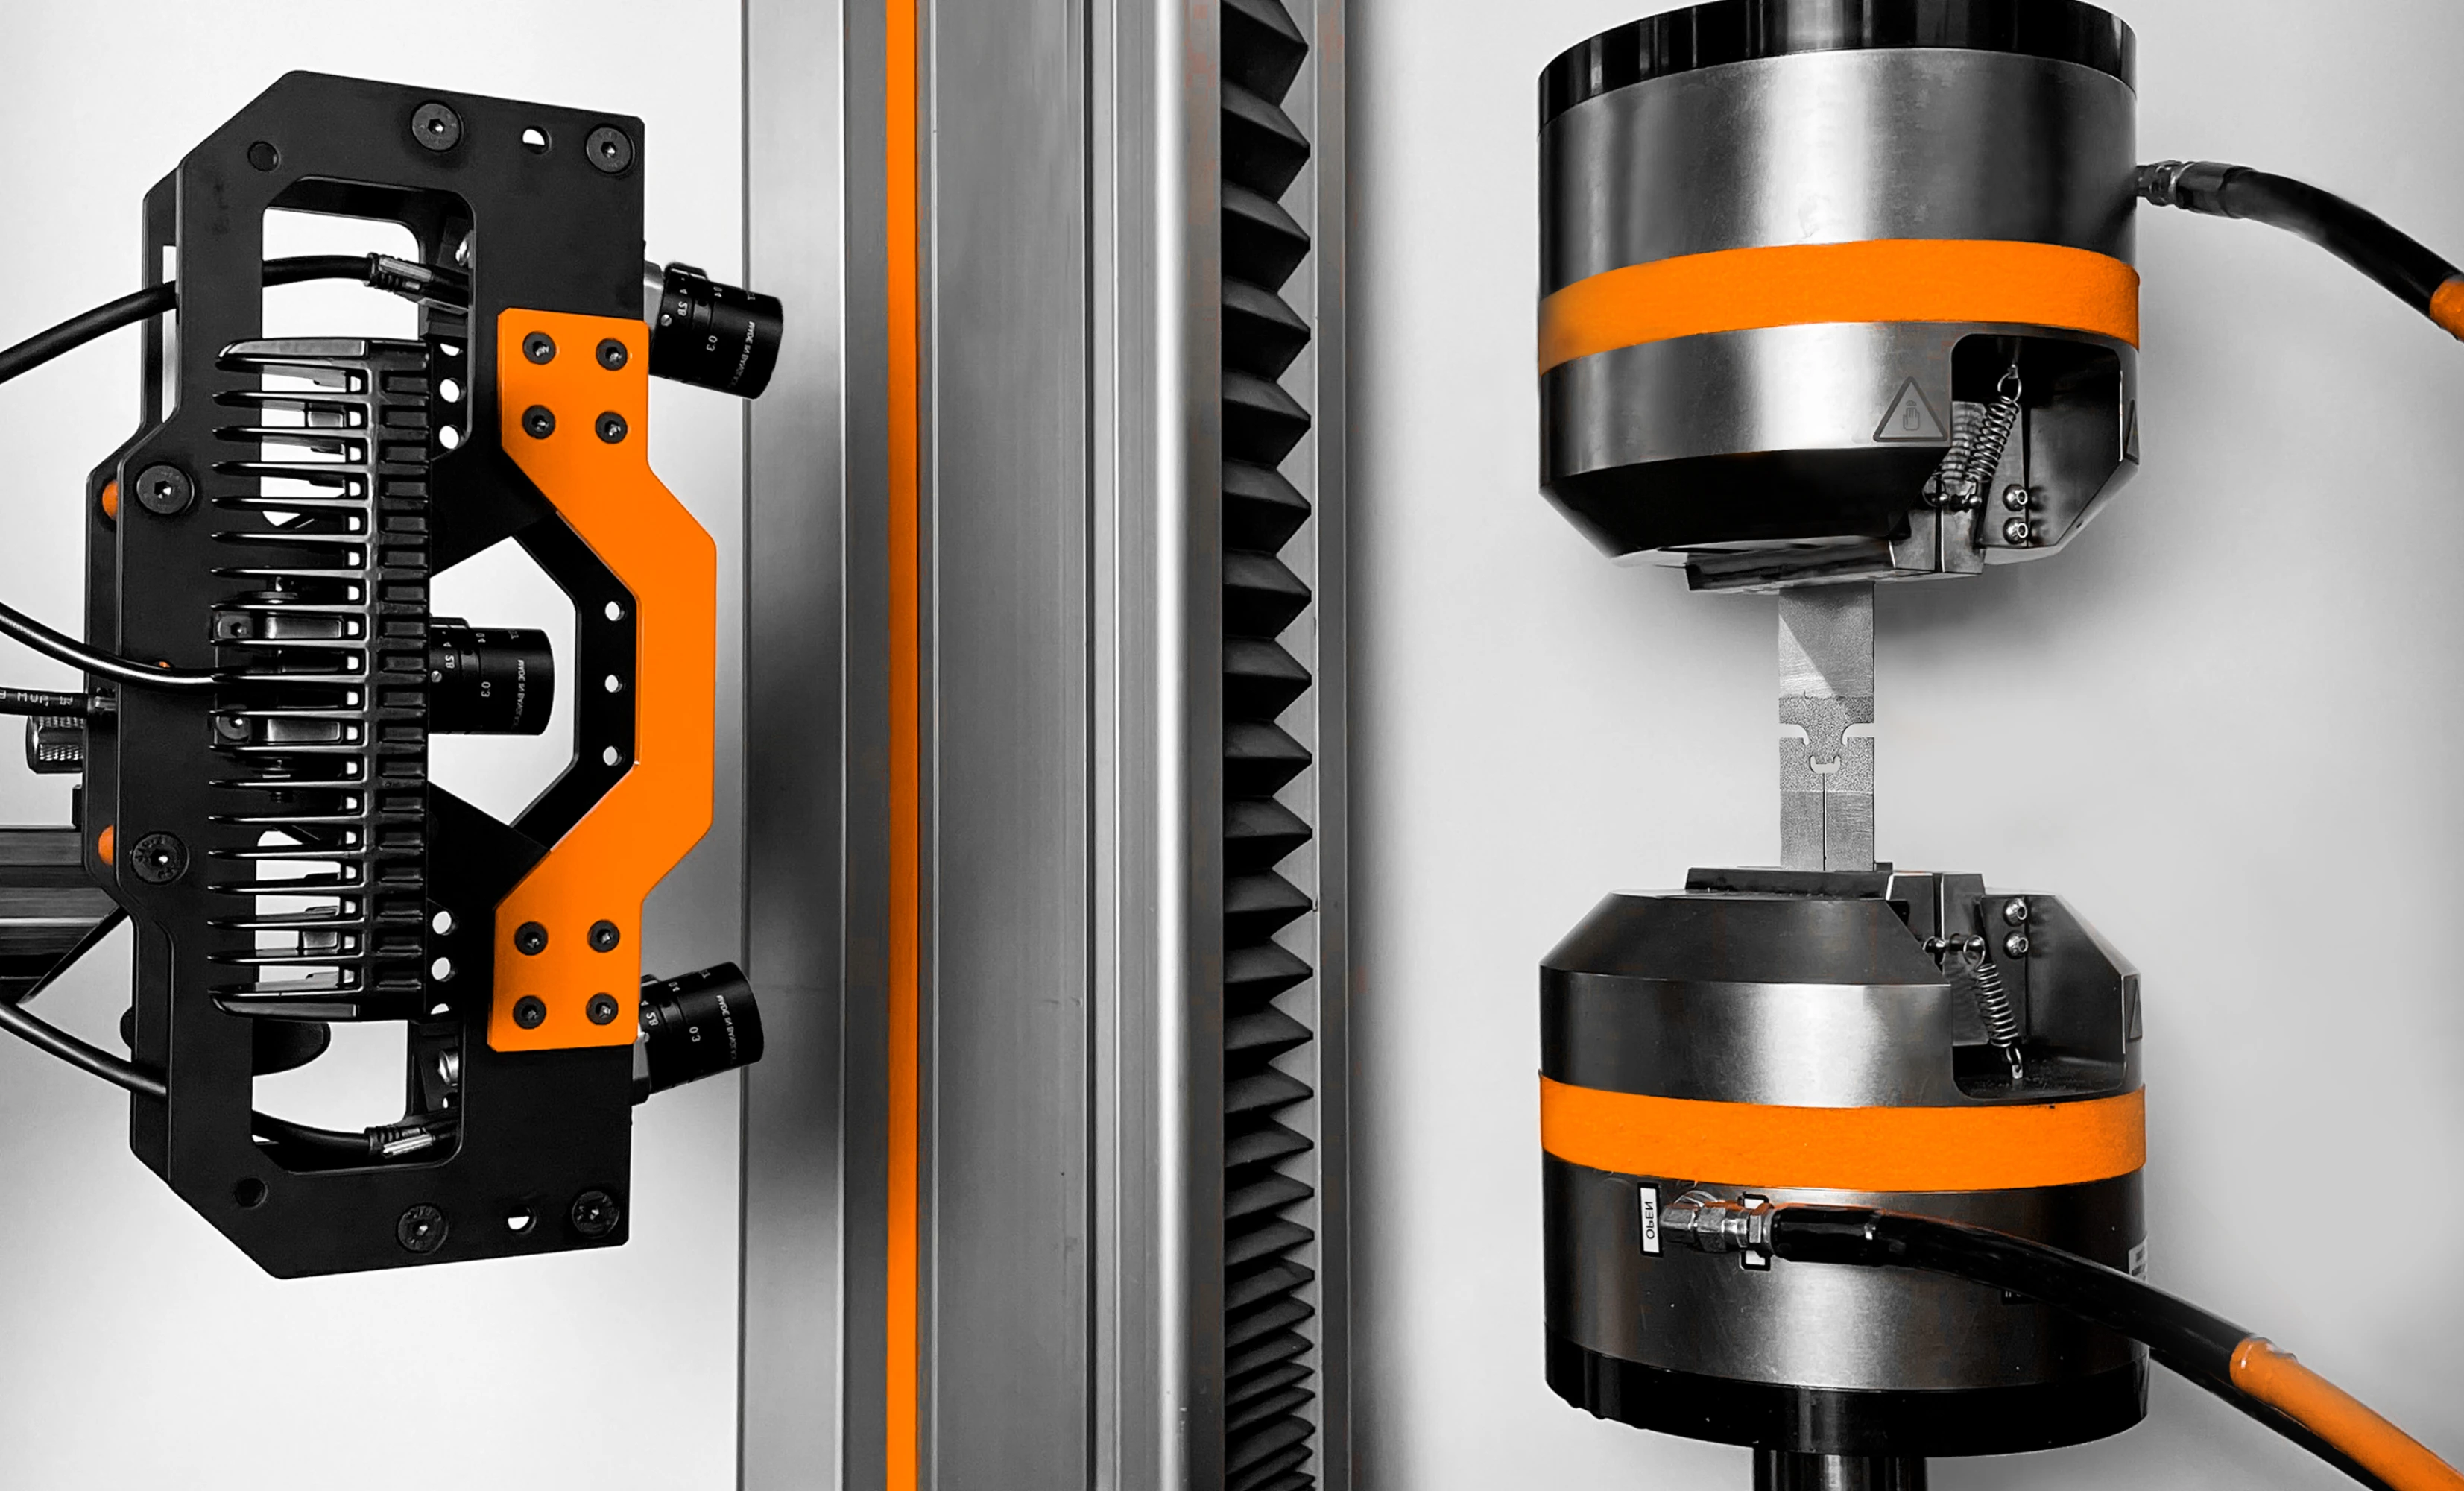
 3D-DIC-with-Shear Testing Setup_Z050_mi-Sensor
Another common DIC practice is to use two cameras instead of one. DIC with one camera is called 2D-DIC, while DIC with two cameras is known as 3D-DIC (also called Stereo-DIC). With 3D-DIC, paired (synchronized) cameras record images of the same surface. We can then compare image pairs taken at the same time to obtain more information than what can be gleaned from a single camera.
2D-DIC and 3D-DIC each have their advantages. 2D-DIC is less costly, easier to set up, and easier to use, but requires the camera to be perpendicular to a planar deforming surface to give accurate results.
3D-DIC is sometimes more accurate but is more expensive and often requires lengthy calibration procedures. One major advantage of 3D-DIC is its ability to measure changes in depth. While a single camera is unable to detect the distance from the camera to any point of interest, 3D-DIC provides depth perception by comparing two images captured from different positions.
For material deformation scenarios where the field of deformation is limited within a flat plane (such as the uniaxial tension test), the difference between 2D-DIC and 3D-DIC is typically insignificant.
One more consideration is crucial for DIC measurements: it is important to ensure that the material sample surface has distinctive features that can be identified and tracked in multiple images. A flat, uniformly colored surface would provide few identifiable features. To prevent this, testing engineers apply a black and white speckle pattern (also called a stochastic pattern) to material samples.
This can be achieved quickly and easily by spray-painting the material surface to a solid white, then applying a top layer of black paint with a thin mist. The resulting speckle is high-contrast and non-uniform, making it easy to detect and identify any point on the surface by tracking a distinctive region of the paint pattern.
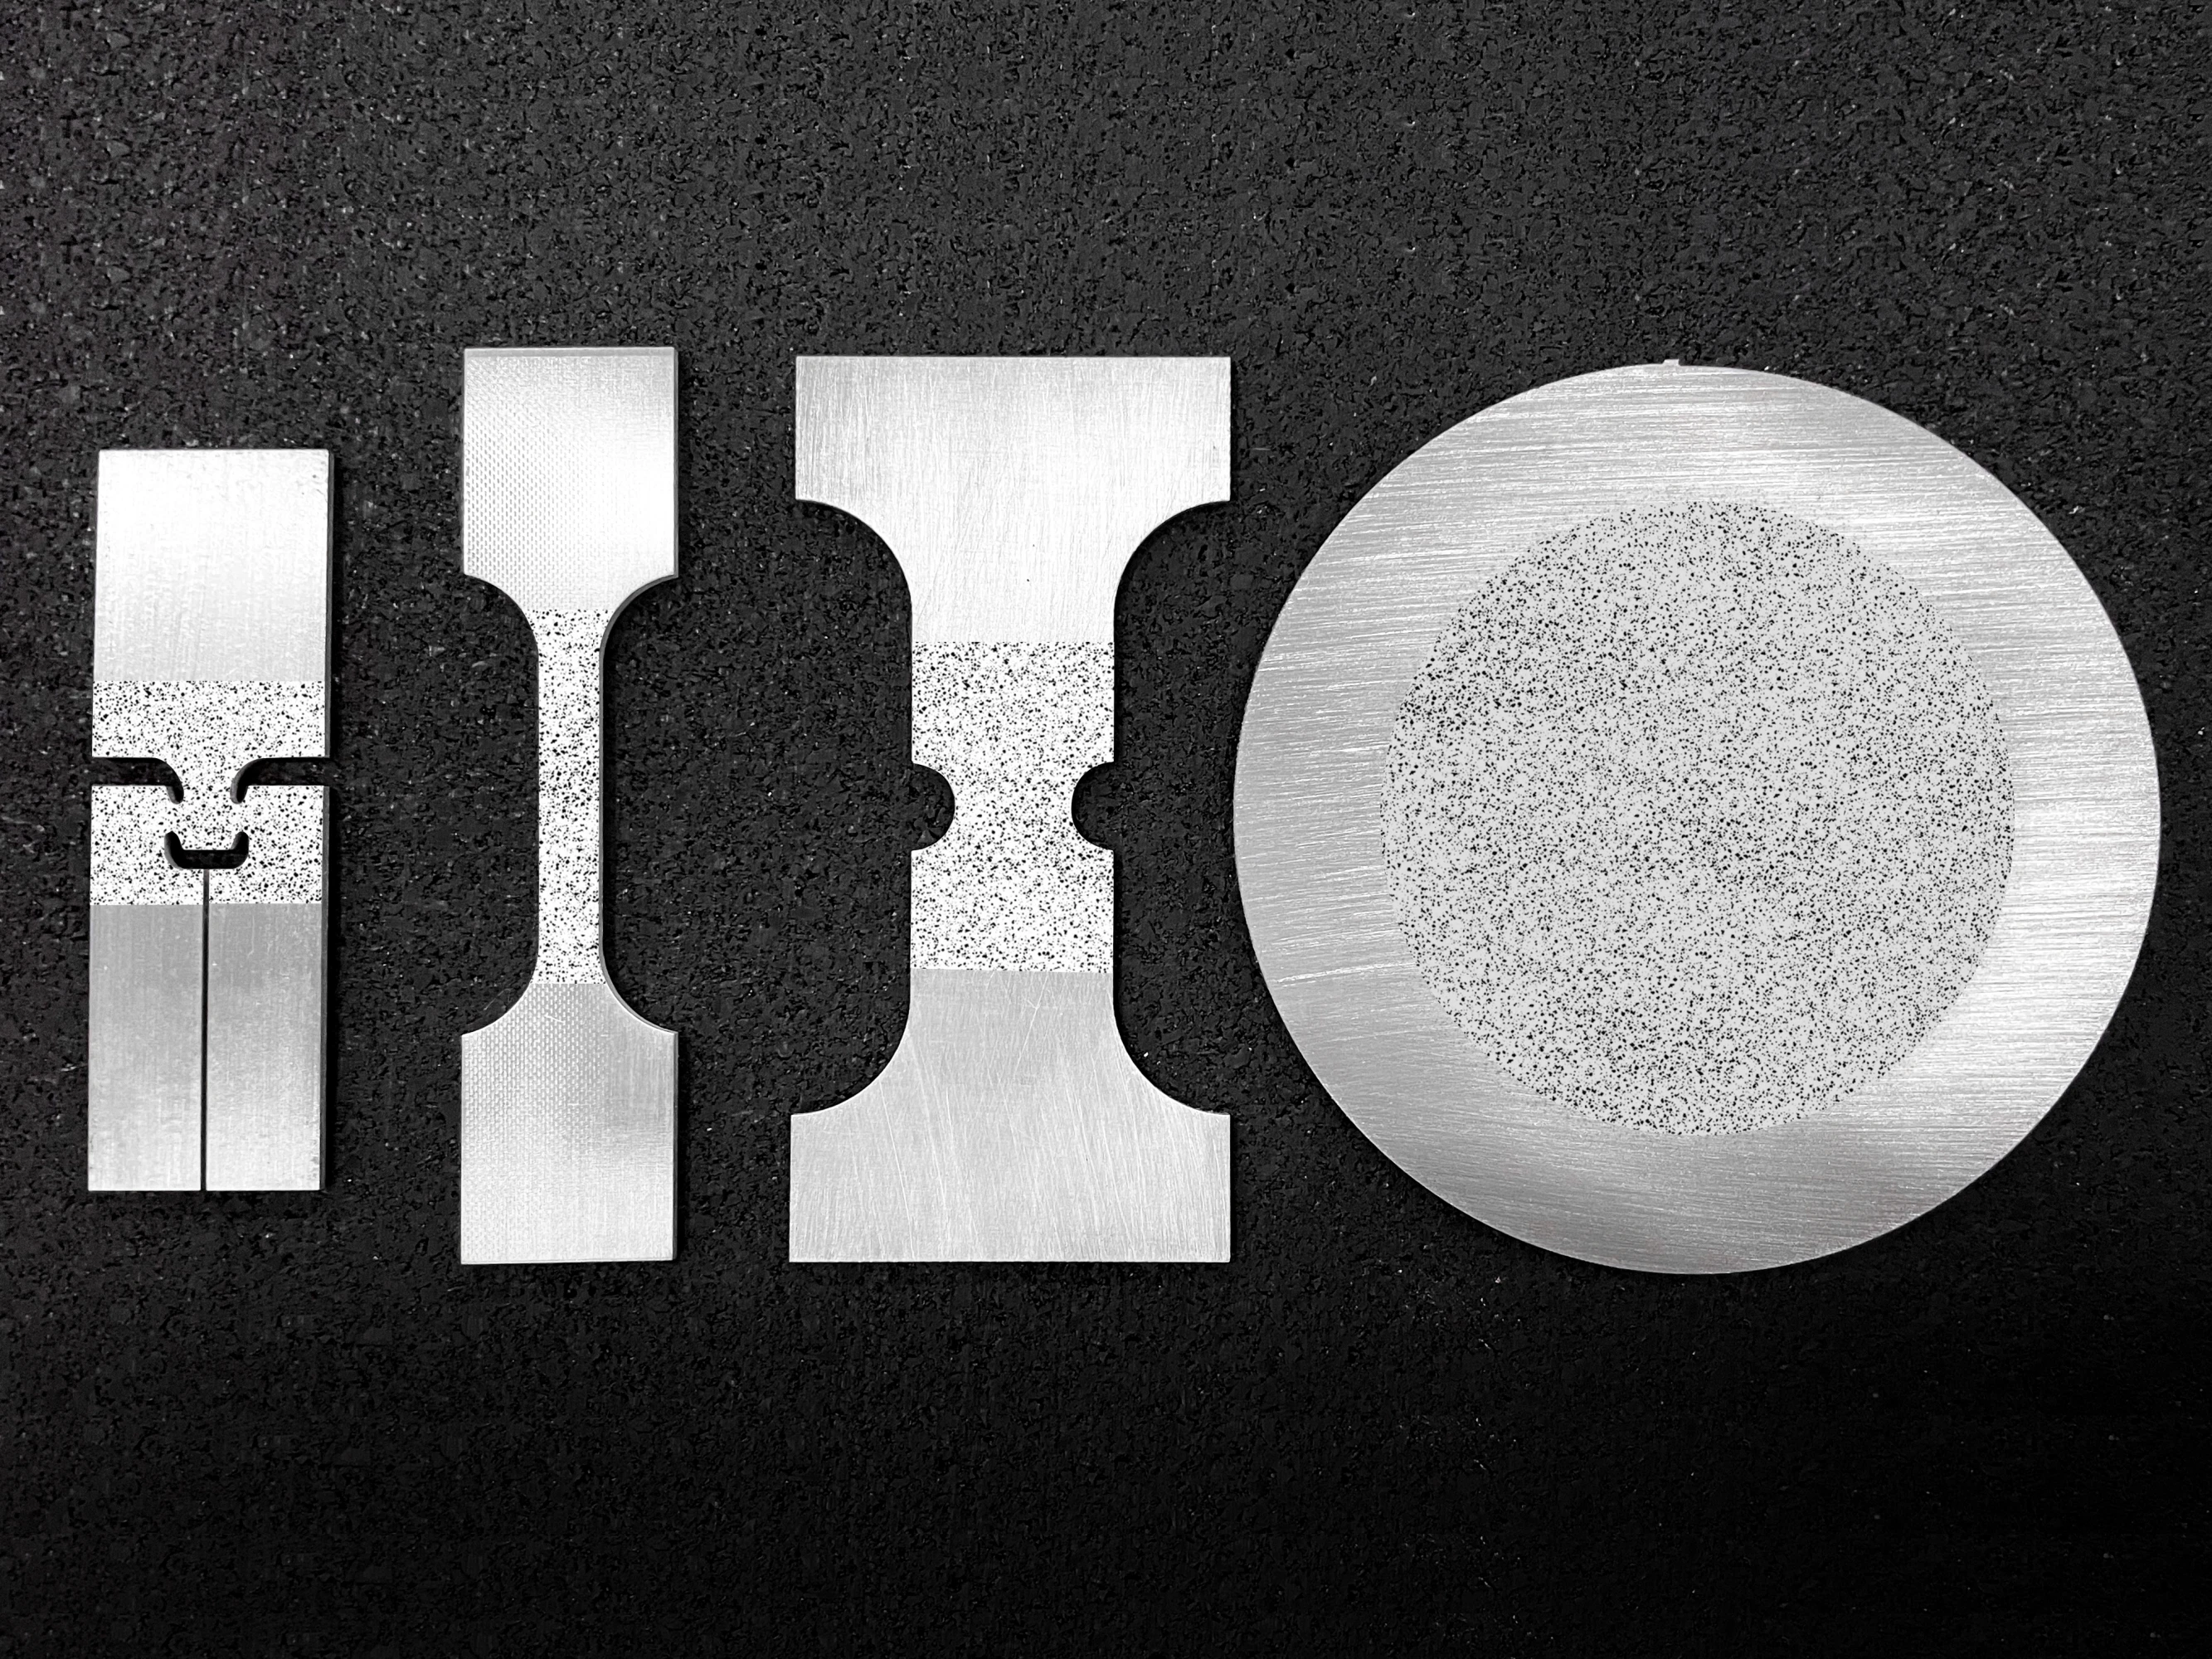
 Fracture Testing Samples-Speckled Pattern
Digital Image Correlation (DIC) Algorithms
Once a series of images has been taken, the first step of DIC is to identify key points. To do this, DIC software defines a “mesh,” which is a set of arbitrarily defined points on the material surface in the image. Convention and convenience dictate that meshes are regular, which means that the chosen points are evenly spaced.
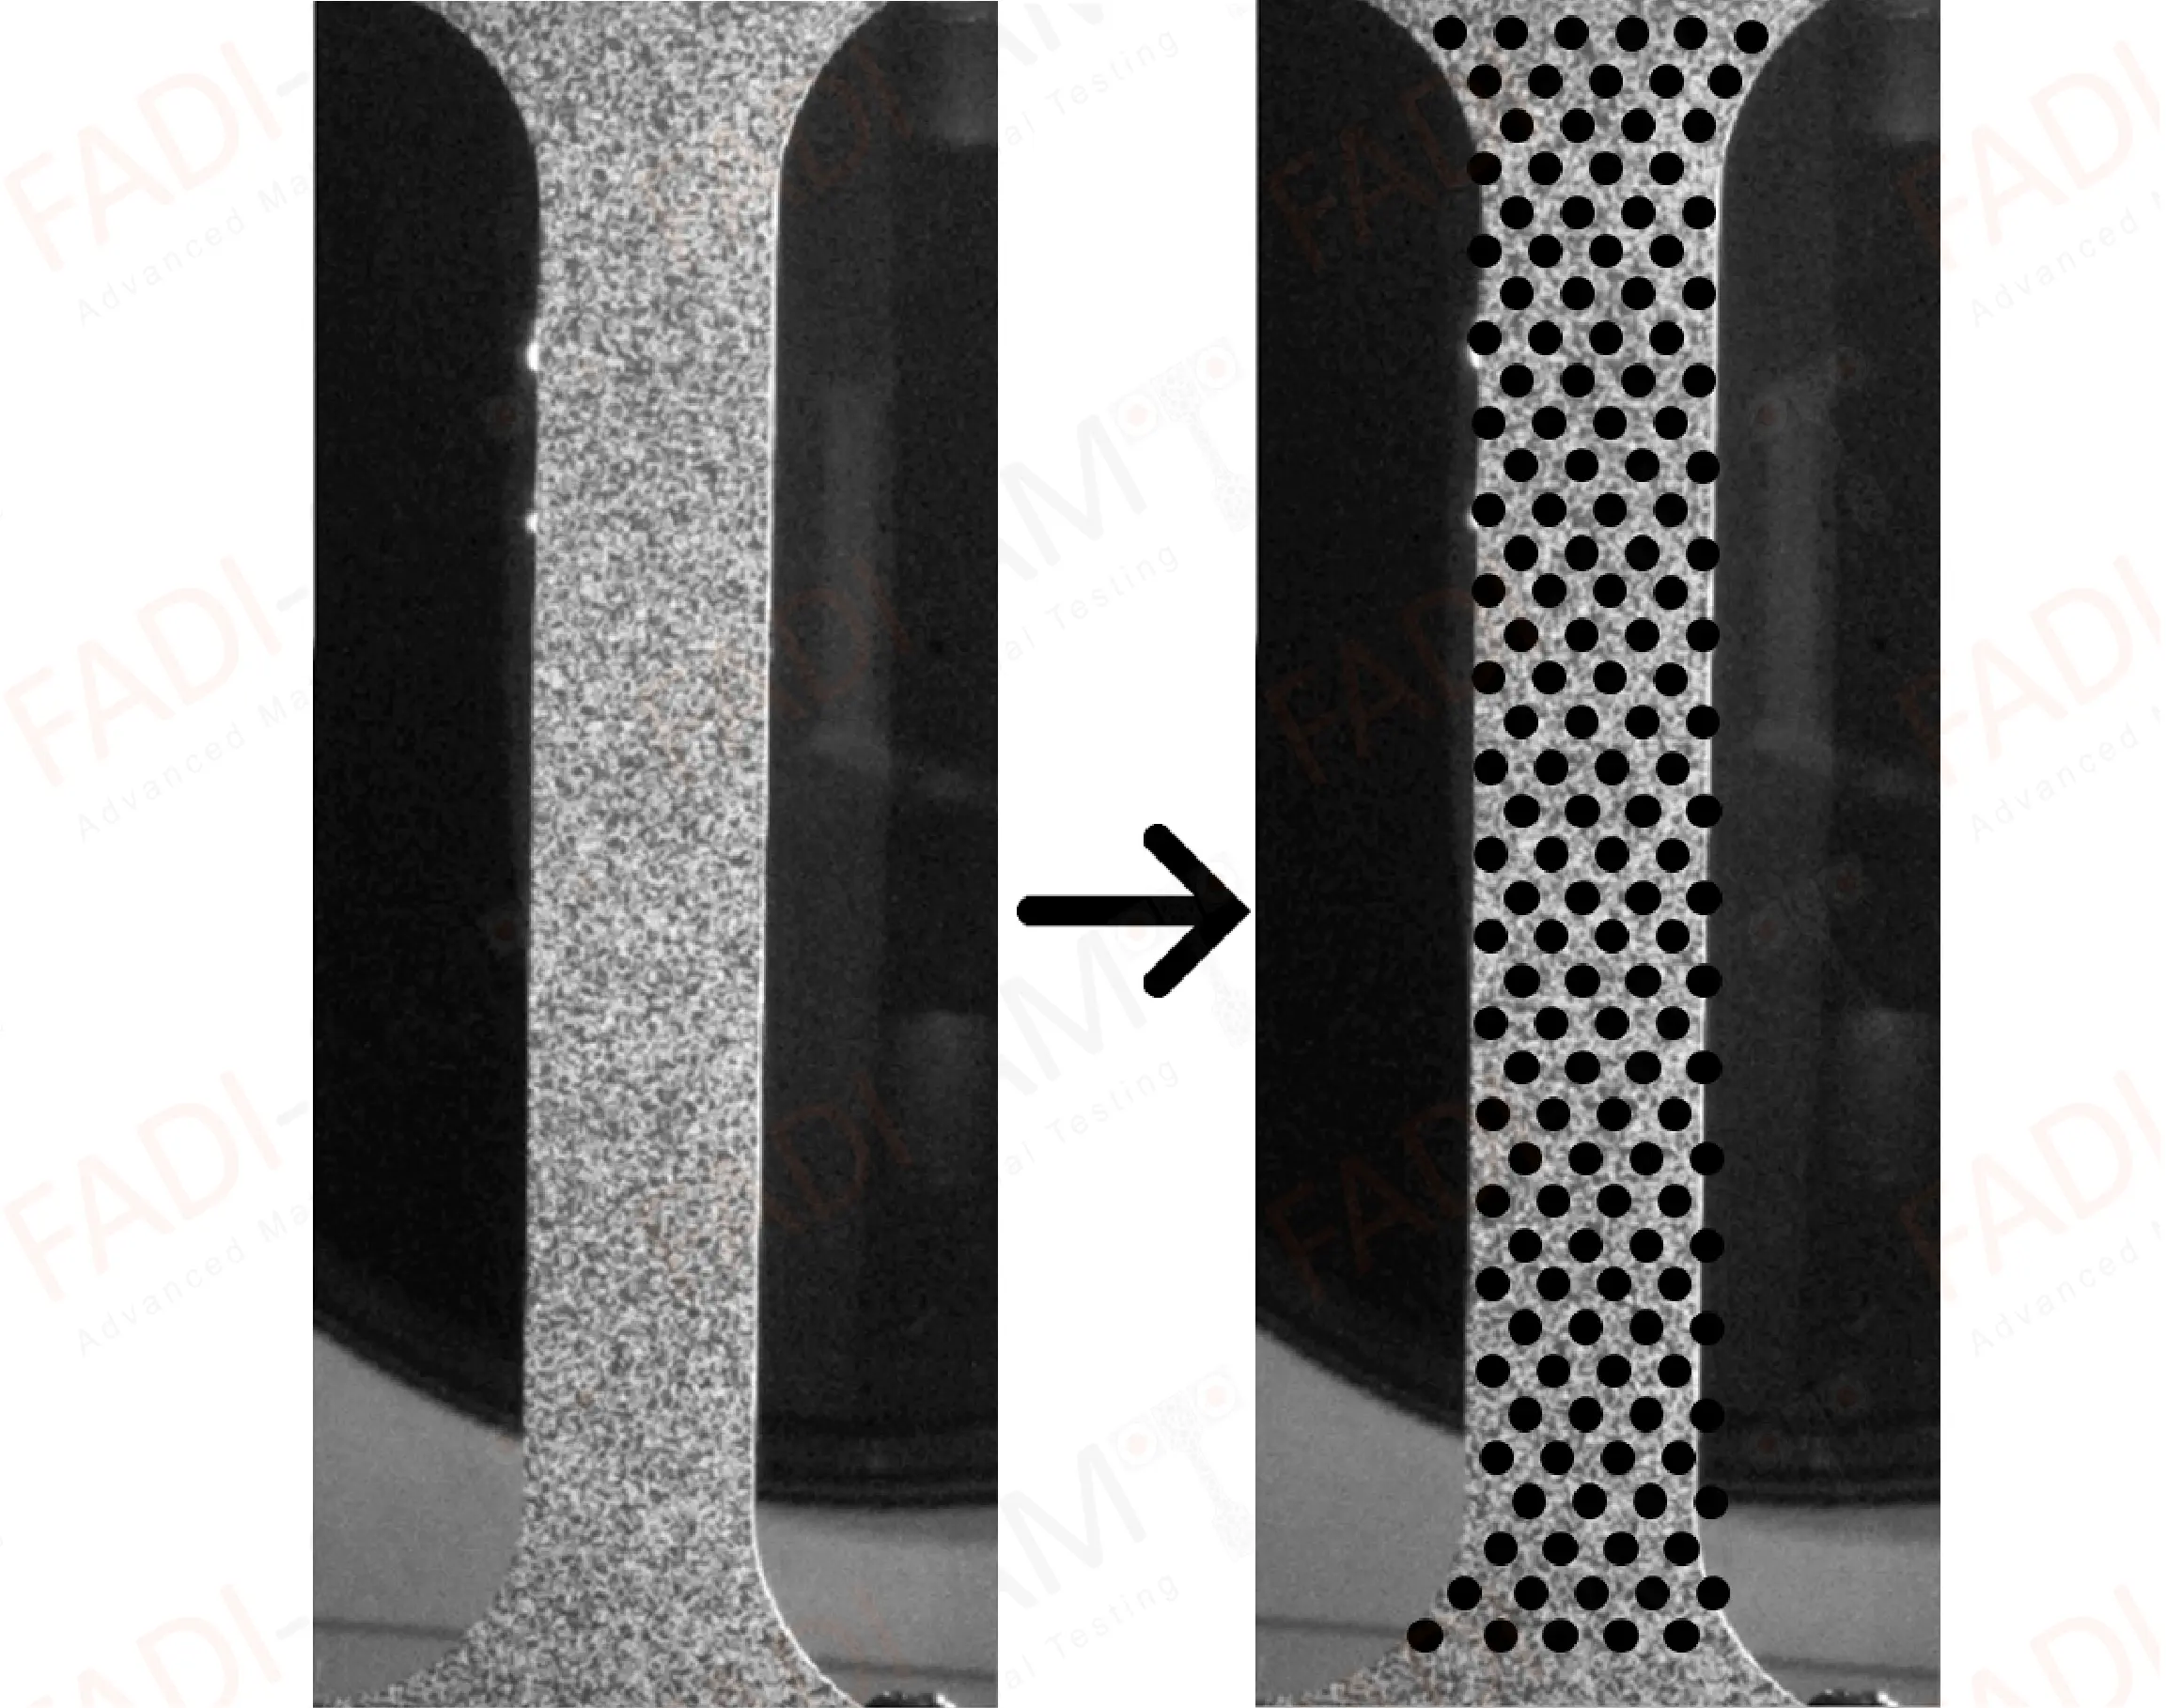
 Identifing the key points in DIC
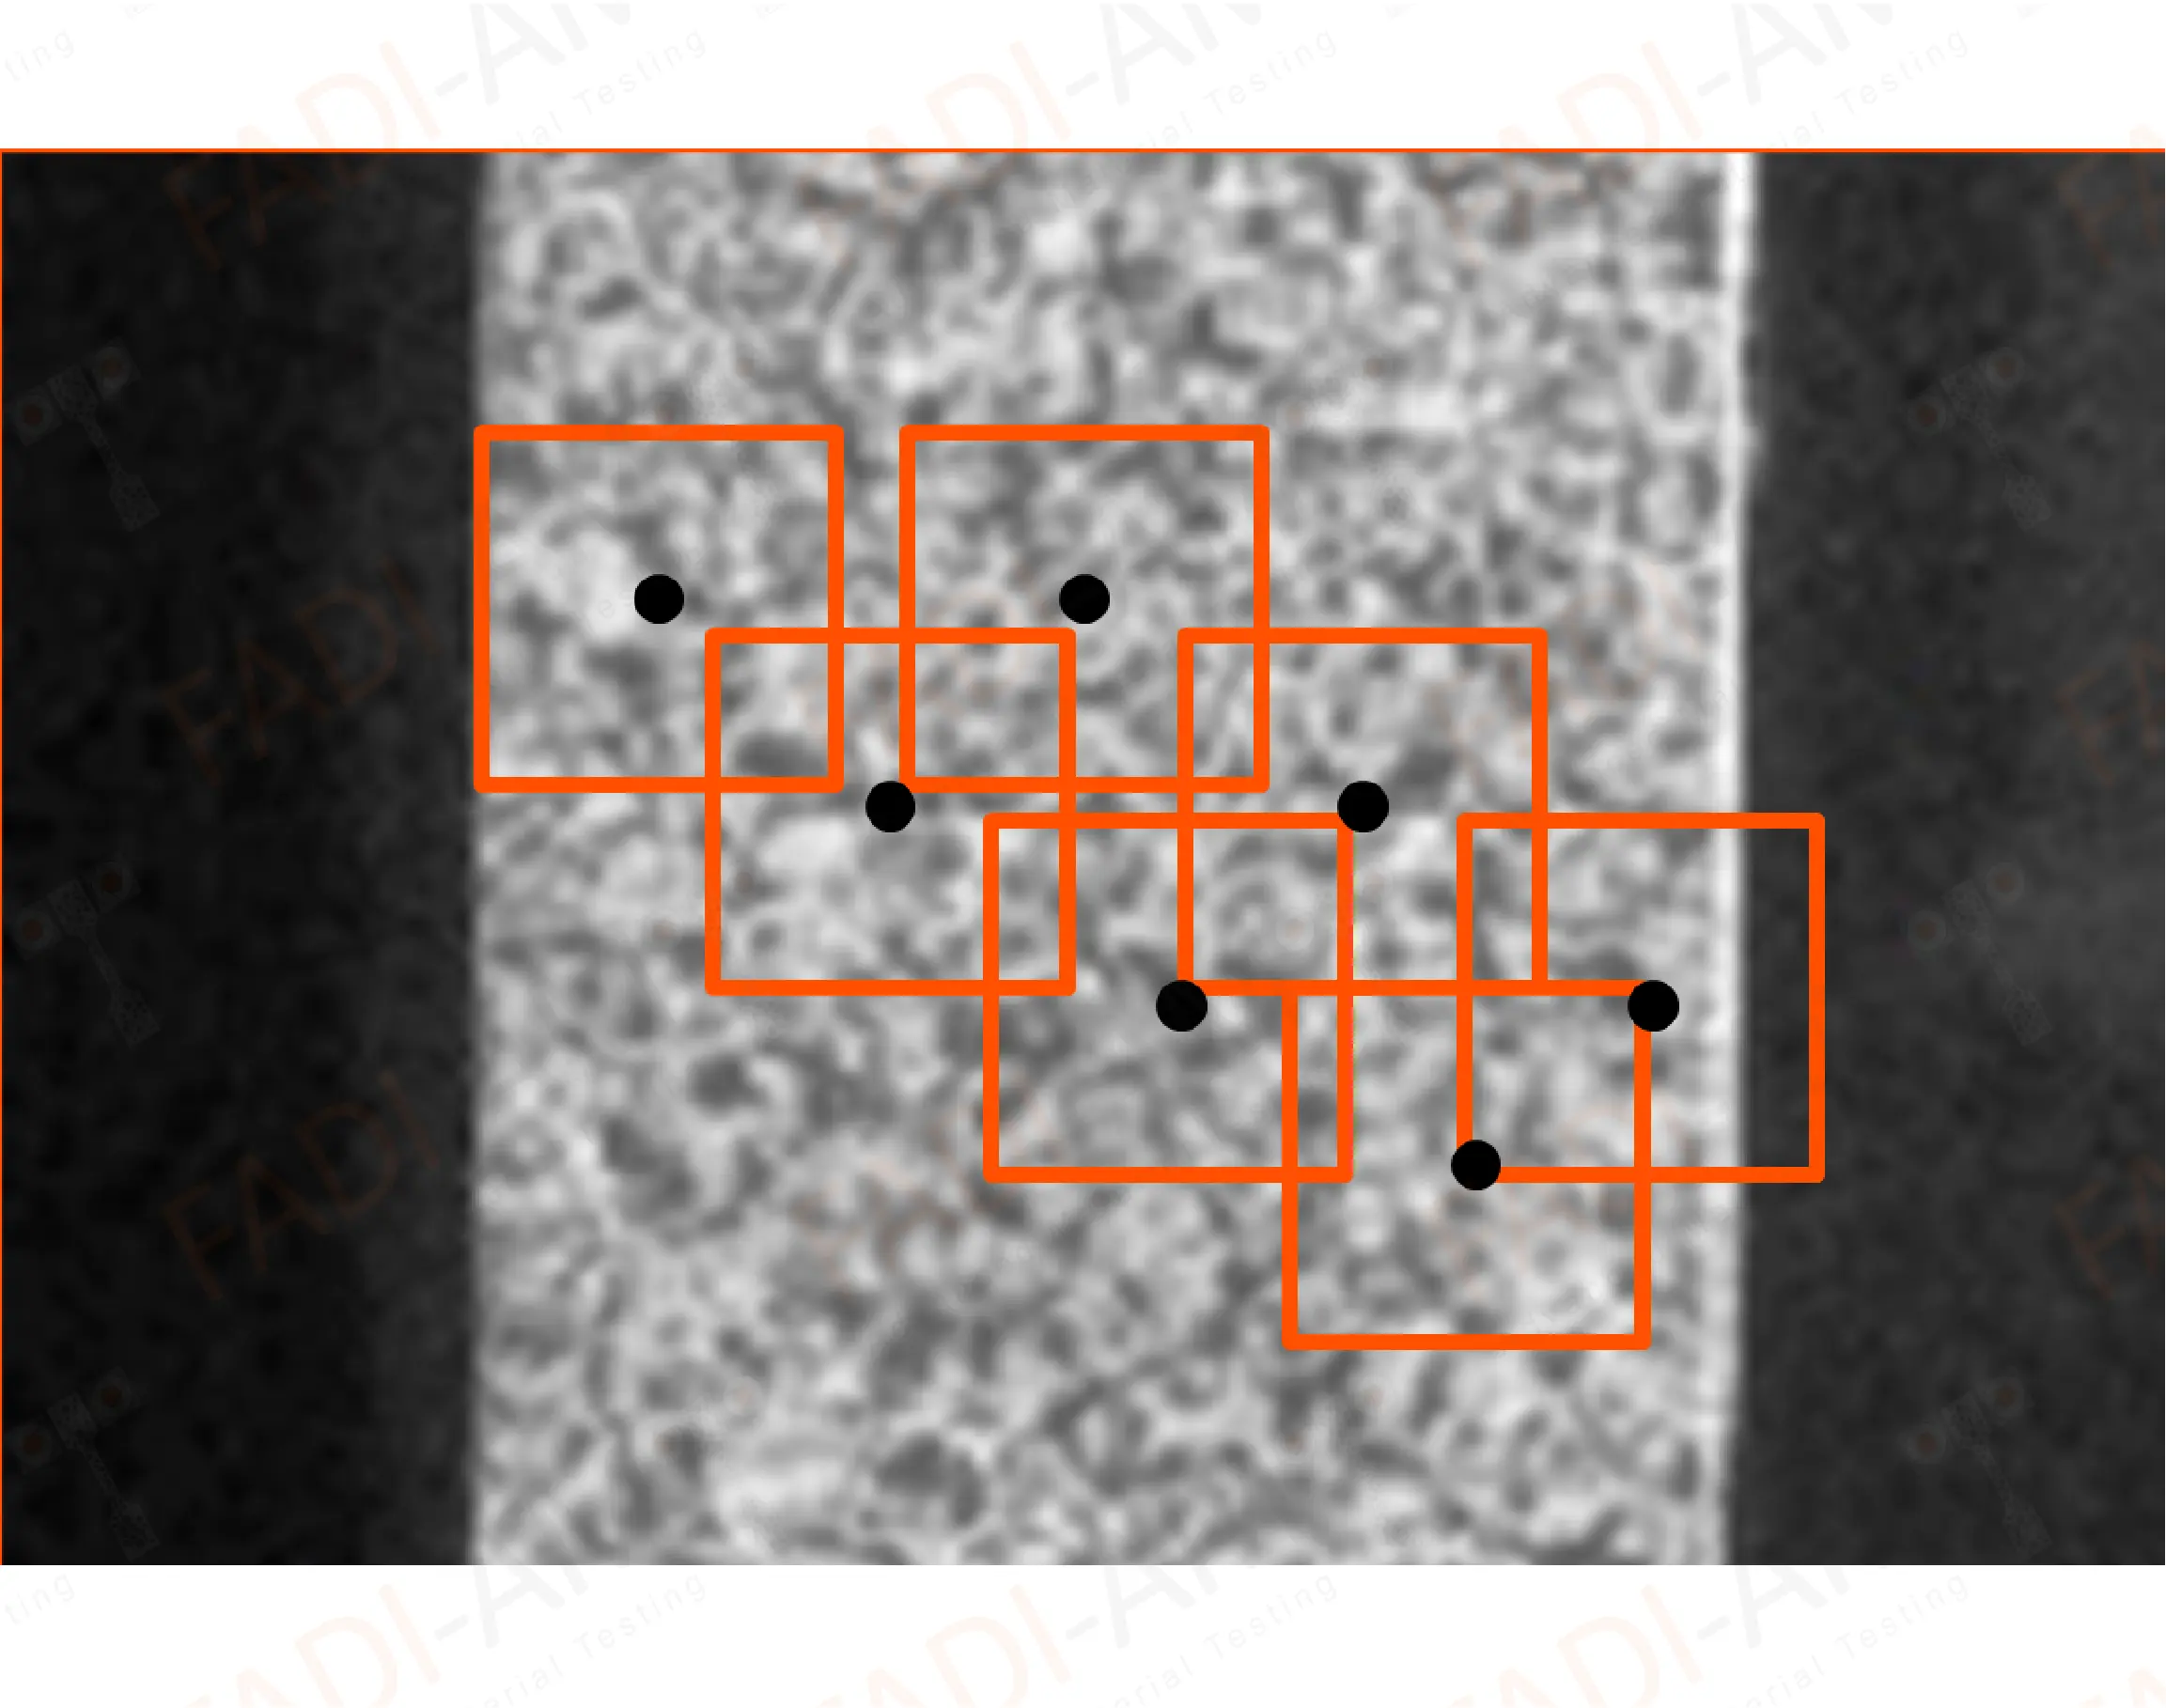
 Creating subsets for the points
Once these mesh points are chosen for one image, we need a means to recognize the same points in other images (in other words, to track them). To do this, we take a small square region around each point. These regions are called subsets. Each mesh point has its own subset, with the mesh point at the center.
Because the sample was painted with a speckle pattern, the appearance of each subset is highly unique. Thus, we can identify the location of each subset in each image in the series, and from it we can find the location of the corresponding mesh point
This process is not as straightforward as it might appear because the material surface (and thus the paint pattern we use to identify the subset) is deforming during a test. This causes the subset to appear stretched in later images, which makes it more difficult to identify.
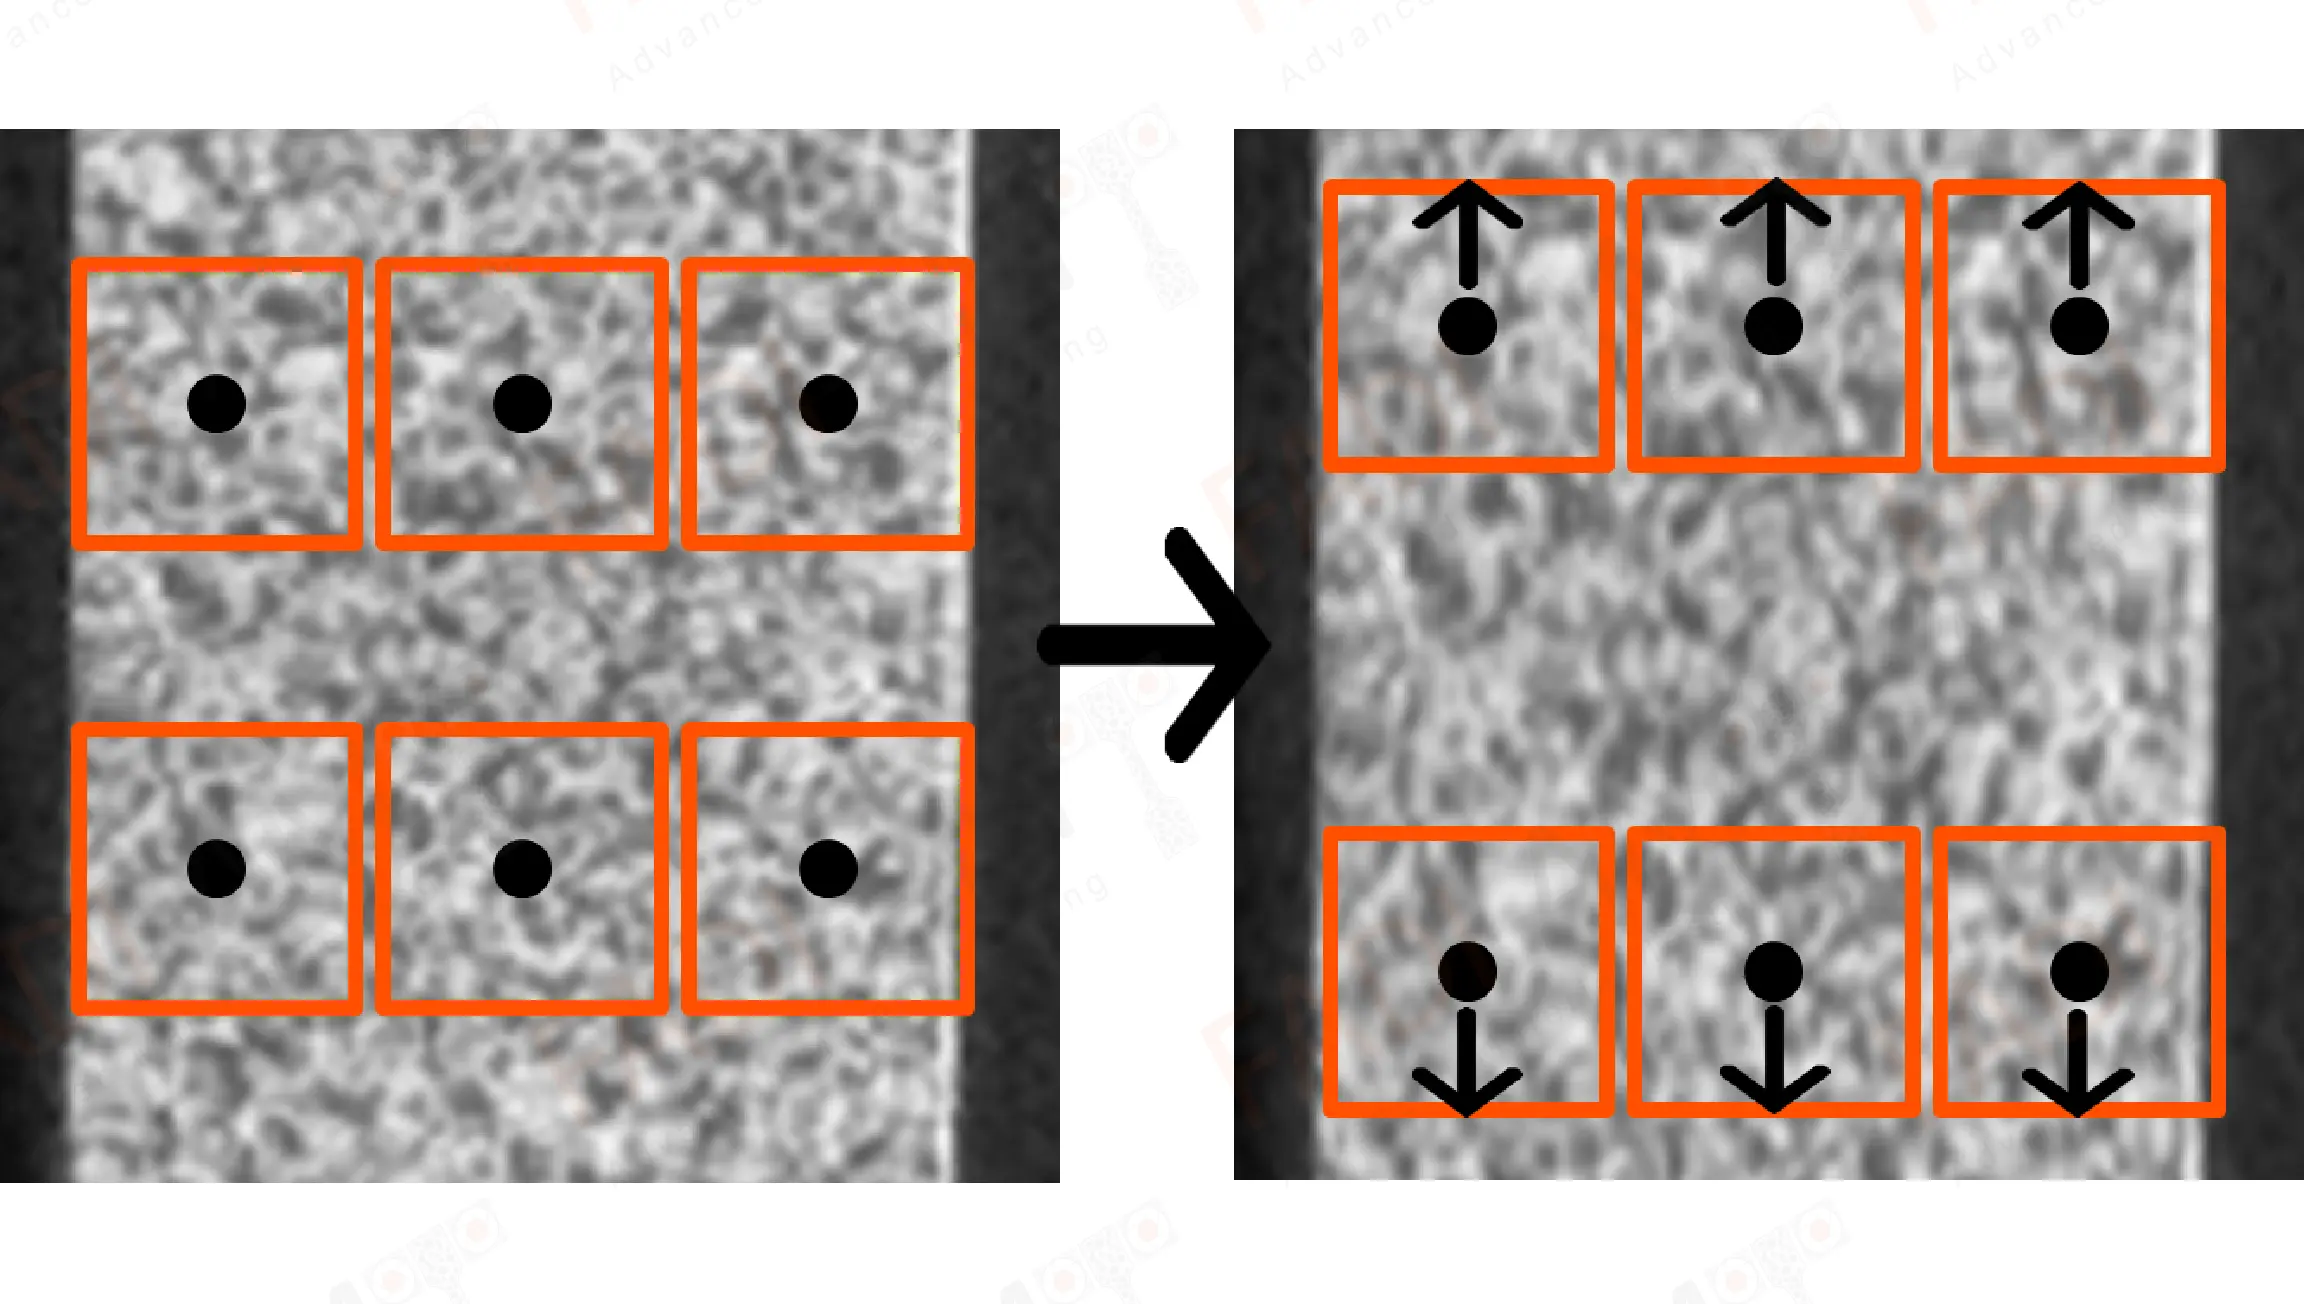
 In DIC the subsets will appear stretched in the iamges during the test
The heart of DIC algorithms is a mathematical construct called the correlation criterion (CC). The correlation criterion is a formula that looks at the difference in appearance between two subsets and quantifies it with a single number. Comparing two identical subsets gives a correlation criterion of zero, while comparing very different subsets gives a large correlation criterion.
DIC algorithms track mesh points by taking the original subset and looking for the corresponding subset in subsequent images. The algorithm essentially uses a guess-and-check method, taking a subset in the current image (the guess) and comparing it with the original using the correlation criterion (the check). It selects the new subset with the lowest correlation criterion. This method can identify corresponding subsets even when the material is greatly deformed.
So far, the algorithm has tracked the movement of a set of key points. However, these mesh point locations still do not represent strain. The final step in DIC processing is to translate point locations in images (measured in pixels) to point locations in the real world (with real distance units). This process is very different for 2D- and 3D-DIC.
2D-DIC uses a simple scale to convert image pixels into physical distances. By taking an image of an object with known length (such as a ruler), the known length is measured in pixels. We can then take any pixel distance in the image and multiply it by the ratio of real length units to pixels. This process assumes that the surface of the material sample is exactly perpendicular to the axis of the camera, which is never the case in the real world. This inevitably creates some measurement error.
3D-DIC does not require a perpendicular camera setup, but the process of converting image distances to real distances is more complicated. 3D-DIC must be calibrated before use; this involves capturing images of calibration panels or other well-defined scaling objects in a range of positions.
Various mathematical calibration processes can then be used to determine the relative orientation of the cameras. With this information, it is possible to calculate the real-world 3D location of any pair of corresponding points in a pair of images from the two cameras.
This process is mathematically and computationally intensive compared to the scaling of 2D-DIC, but it is less prone to errors and provides depth information.

 DIC
DICDigital Image Correlation (DIC) Output
Once the DIC algorithm has calculated the real-world displacement of a set of points on the material surface, determining the strain is straightforward. As with any other application, the strain between two points on the material surface is equal to the change in distance between them divided by the original distance. Thus, for any pair of mesh points, DIC can determine the strain between them at any point in the test.
So far, we have been talking about DIC using discrete points (the mesh). However, DIC is not limited to measuring deformation/strain only at these points! In fact, DIC can estimate the deformation at any point on the material surface, even if it falls between mesh points. This is done by a process called interpolation, which takes the discrete mesh of displacement values and estimates the displacement everywhere between them. This creates a continuous deformation map of the entire surface, allowing us to calculate strain between any two points on the sample.
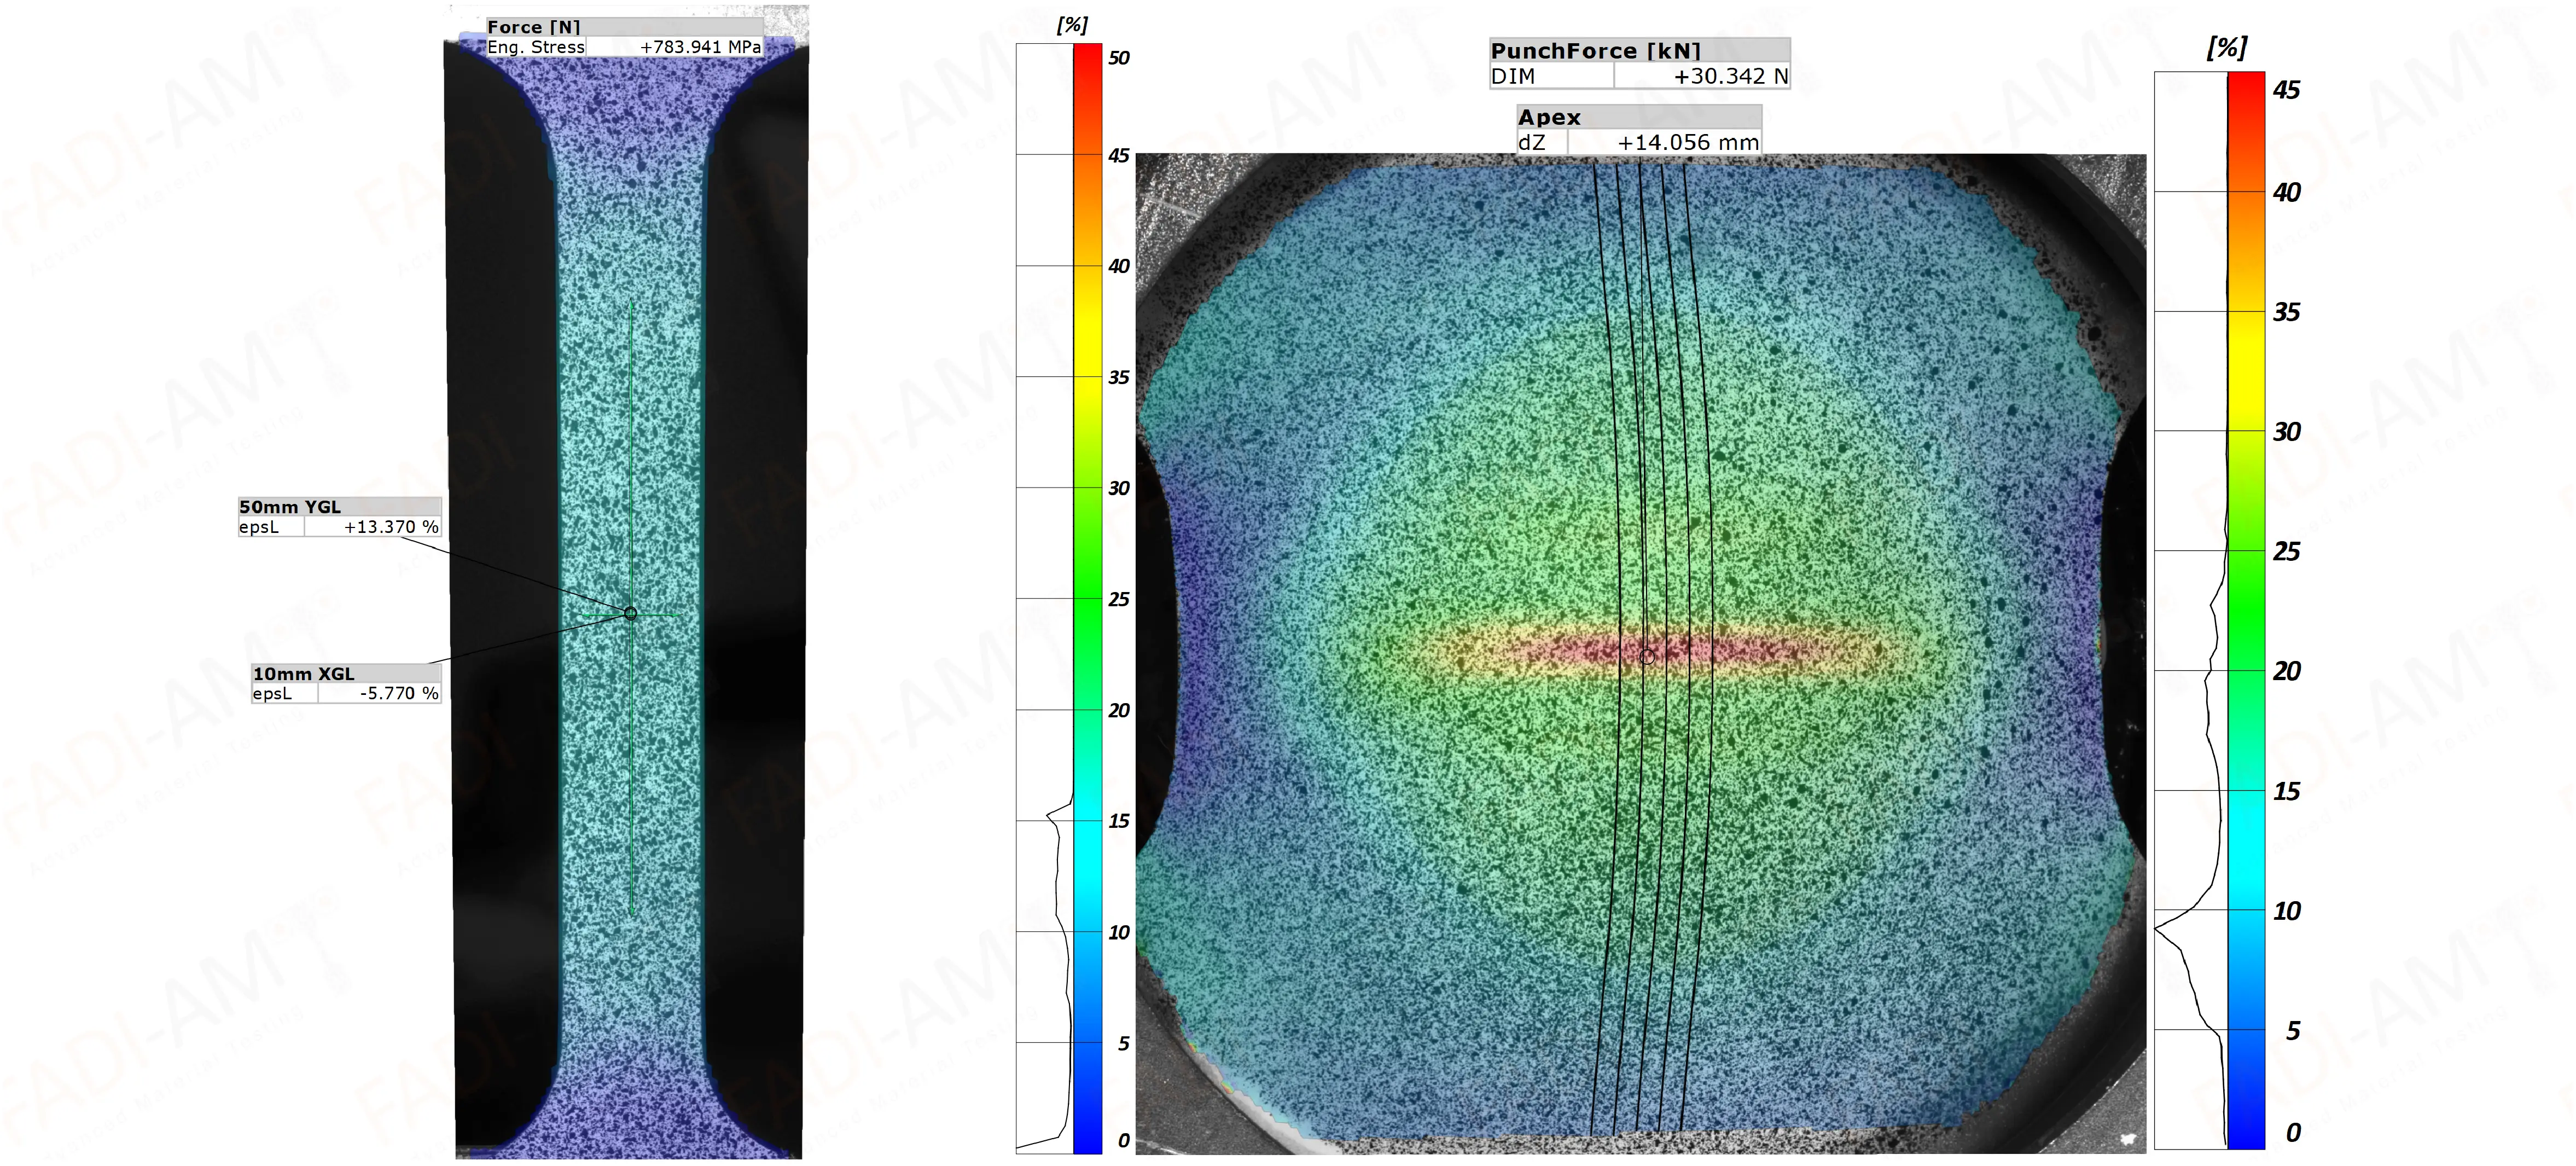
 DIC for Tension and FLC Test
Thus, the final product of DIC is a real-time, continuous strain map over the entire surface of a material testing sample. This provides a wealth of valuable information about the response of a material to loading. Though DIC is a little more complicated than using a traditional strain sensor, the benefits it provides make it a worthwhile addition to many material tests.
Advantages of Digital Image Correlation (DIC)
Prior to the introduction of DIC, material deformation was usually measured mechanically. This can be done by attaching a device such as a strain gauge or an extensometer to a sample. As the sample deforms, the measuring device stretches with it, producing an electric signal proportional to the amount of stretching. This signal represents the magnitude of the material deformation over the area where the sensor is attached.
While mechanical strain sensors can be very accurate, they come with important limitations. Mechanical strain sensors are best for measuring strain along a single axis. This is sometimes permissible when the test corresponds to uniaxial conditions, but strain gauges are inadequate for biaxial testing such as bulge and FLC because they cannot measure strain along multiple axes in the same small region.
Another hinderance of strain gauges and extensometers is the fact that they only work locally. A strain gauge can only measure deformation happening directly underneath its attached surface. An extensometer can only measure strain that happens between its two clamping arms. This means that tests which utilize a large material sample may require mechanical sensors that are large and heavy, or else multiple sensors attached over the surface of interest. This can be cost-prohibitive and can interfere with the test in other ways.
Finally, mechanical sensors are subject to physical limitations. They necessarily take up physical space near the sample, and this means they can get in the way of other parts of the testing apparatus. Additionally, some material testing sample geometries are unsuitable for sensors that clip on or adhere to their surfaces.
All these restrictions are bypassed by DIC. DIC can measure strain along multiple axes at once, it can measure strain over the entire sample, and it is not subject to the same physical limitations as mechanical strain sensors.

